网站首页 文章专栏 学习理解 Spring ApplicationListener,以及 ApplicationListener在soul网关的应用
一. ApplicationContext是什么
ApplicationContext事件机制是观察者设计模式的实现,通过ApplicationEvent类和ApplicationListener接口,可以实现ApplicationContext事件处理。
如果容器中有一个ApplicationListener Bean,每当ApplicationContext发布ApplicationEvent时,ApplicationListener Bean将自动被触发。这种事件机制都必须需要程序显示的触发。
其中spring有一些内置的事件,当完成某种操作时会发出某些事件动作。比如监听ContextRefreshedEvent事件,当所有的bean都初始化完成并被成功装载后会触发该事件,实现ApplicationListener
同样事件可以自定义、监听也可以自定义,完全根据自己的业务逻辑来处理。
| Spring 内置事件 | 描述 |
| ContextRefreshedEvent | ApplicationContext 被初始化或刷新时,该事件被发布。这也可以在 ConfigurableApplicationContext接口中使用 refresh() 方法来发生。此处的初始化是指:所有的Bean被成功装载,后处理Bean被检测并激活,所有Singleton Bean 被预实例化,ApplicationContext容器已就绪可用 |
| ContextStartedEvent | 当使用 ConfigurableApplicationContext (ApplicationContext子接口)接口中的 start() 方法启动 ApplicationContext 时,该事件被发布。你可以调查你的数据库,或者你可以在接受到这个事件后重启任何停止的应用程序。 |
| ContextStoppedEvent | 当使用 ConfigurableApplicationContext 接口中的 stop() 停止 ApplicationContext 时,发布这个事件。你可以在接受到这个事件后做必要的清理的工作。 |
| ContextClosedEvent | 当使用 ConfigurableApplicationContext 接口中的 close() 方法关闭 ApplicationContext 时,该事件被发布。一个已关闭的上下文到达生命周期末端;它不能被刷新或重启。 |
| RequestHandledEvent | 这是一个 web-specific 事件,告诉所有 bean HTTP 请求已经被服务。只能应用于使用DispatcherServlet的Web应用。在使用Spring作为前端的MVC控制器时,当Spring处理用户请求结束后,系统会自动触发该事件。 |
| ApplicationStartedEvent | spring boot启动开始时执行的事件 |
ApplicationListener是一个接口,里面只有一个onApplicationEvent方法。如果在上下文中部署一个实现了ApplicationListener接口的bean,那么每当在一个ApplicationEvent发布到 ApplicationContext时,调用ApplicationContext.publishEvent()方法,这个bean得到通知。类似于Oberver设计模式。其接口定义如下:
@FunctionalInterface
public interface ApplicationListener extends EventListener {
    void onApplicationEvent(E var1);
}
二. ApplicationContext能做什么
1). 可以根据内置的事件类型,在ApplicationContext bean被初始化的时候做某些操作,发送消息,初始化bean等等
2). 可以在springboot初始化加载完成后,进行某些操作
3). 可以在web服务请求被响应后,做某些事件
4). 可以根据自定义事件类型,发布事件,监听到事件后触发某些操作等等,这也是最常见的使用
三. ApplicationContext的demo
1). 体验spring 内置事件
定义ApplicationStartedEventListener监听器,实现ApplicationListener接口,且在接口泛型定义ApplicationStartedEvent,就是内置的事件。注意要使用 @Component将listener被springboot感知注入
@Component
public class ApplicationStartedEventListener implements ApplicationListener<ApplicationStartedEvent> {
    @Override
    public void onApplicationEvent(ApplicationStartedEvent event) {
        System.out.println("============ApplicationStartedEvent============");
        System.out.println(event);
    }
}
2). 同样的代码我们多搞几份,更改监听的事件类型
@Component
public class ContextClosedEventListener implements ApplicationListener<ContextClosedEvent> {

    @Override
    public void onApplicationEvent(ContextClosedEvent contextClosedEvent) {
        System.out.println(contextClosedEvent);
        System.out.println("=============contextClosedEvent............................");
    }
}

@Component
public class ContextRefreshedEventListener implements ApplicationListener<ContextRefreshedEvent> {

    @Override
    public void onApplicationEvent(ContextRefreshedEvent contextRefreshedEvent) {
        System.out.println(contextRefreshedEvent);
        System.out.println("=============contextRefreshedEvent............................");
    }
}

@Component
public class RequestHandledEventListener implements ApplicationListener<RequestHandledEvent> {

    @Override
    public void onApplicationEvent(RequestHandledEvent requestHandledEvent) {
        System.out.println(requestHandledEvent);
        System.out.println("=============requestHandledEvent............................");
    }
}
以上的事件分别为:
1>. ApplicationStartedEvent:spring boot启动开始时执行的事件
2>. ContextClosedEvent: 一个已关闭的上下文到达生命周期末端
3>. ContextRefreshedEvent: ApplicationContext 被初始化或刷新时
4>. RequestHandledEvent: 在使用Spring作为前端的MVC控制器时,当Spring处理用户请求结束后,系统会自动触发该事件
然后启动项目
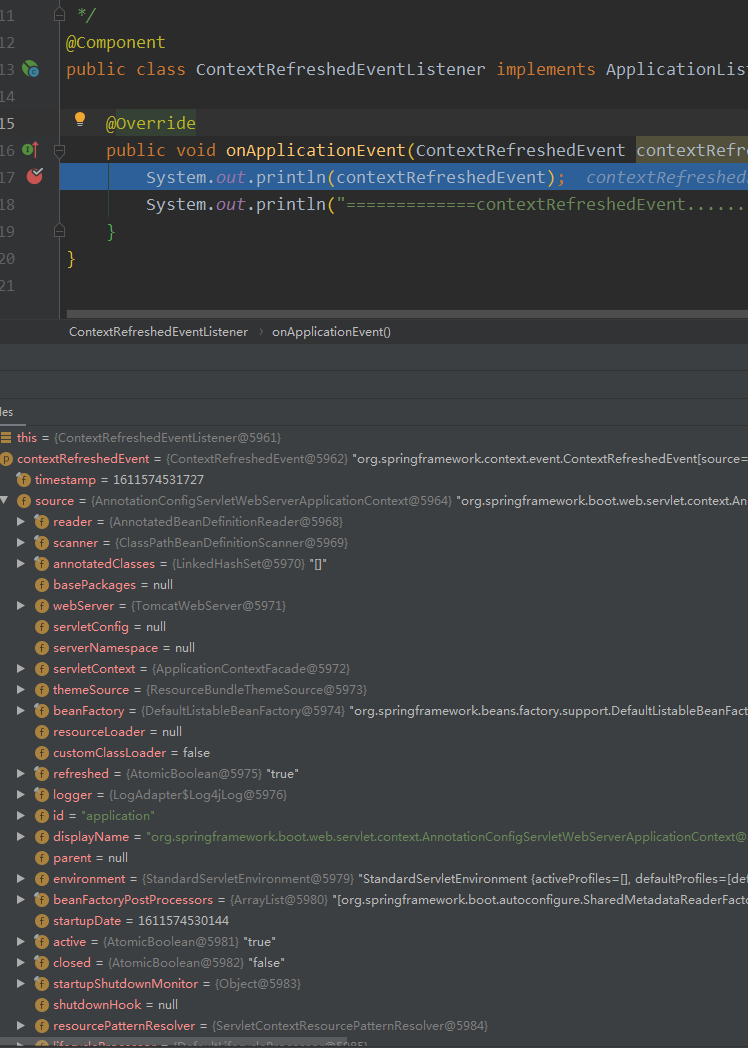
发现先走到了 ContextRefreshedEvent
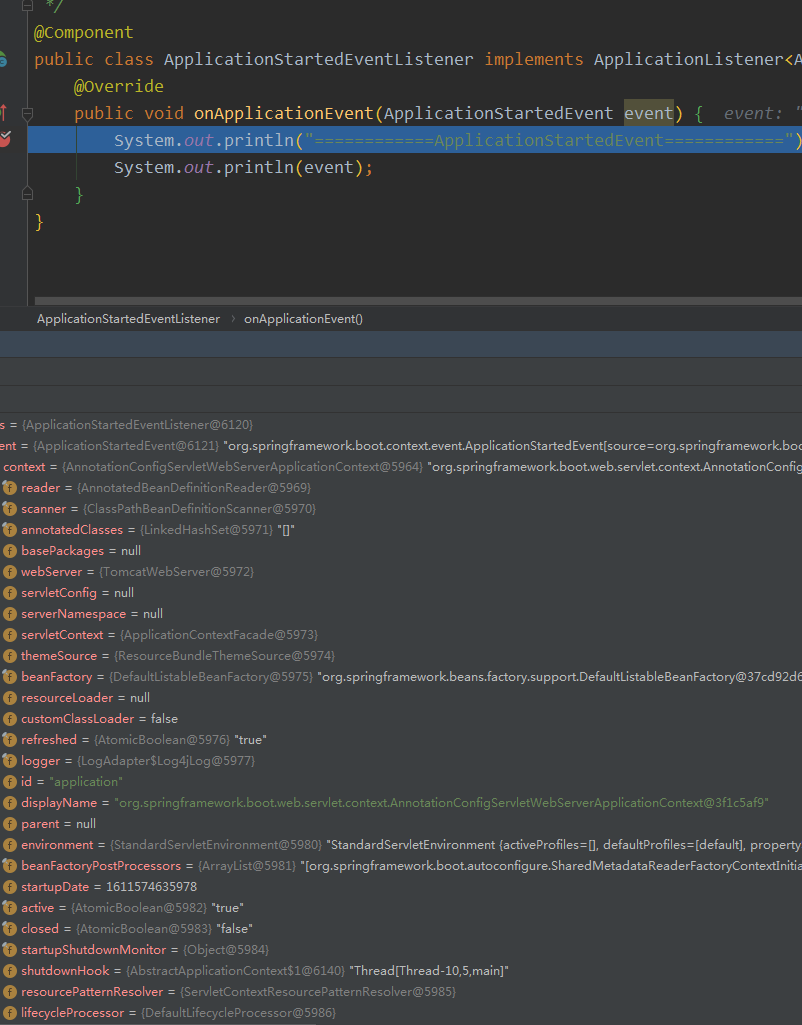
然后走到 ApplicationStartedEvent
日志打印:
2021-01-25 19:37:17.598  INFO 10532 --- [           main] o.s.s.c.ThreadPoolTaskExecutor           : Initializing ExecutorService 'applicationTaskExecutor'
2021-01-25 19:37:17.716 DEBUG 10532 --- [           main] inMXBeanRegistrar$SpringApplicationAdmin : Application Admin MBean registered with name 'org.springframework.boot:type=Admin,name=SpringApplication'
org.springframework.context.event.ContextRefreshedEvent[source=org.springframework.boot.web.servlet.context.AnnotationConfigServletWebServerApplicationContext@3f1c5af9, started on Mon Jan 25 19:37:15 CST 2021]
=============contextRefreshedEvent............................
2021-01-25 19:38:01.149  INFO 10532 --- [           main] o.s.b.w.e.t.TomcatWebServer              : Tomcat started on port(s): 8888 (http) with context path ''
2021-01-25 19:38:01.152  INFO 10532 --- [           main] y.TestserviceApplication                 : Started TestserviceApplication in 46.326 seconds (JVM running for 47.793)
============ApplicationStartedEvent============
org.springframework.boot.context.event.ApplicationStartedEvent[source=org.springframework.boot.SpringApplication@54089484]
然后请求一个web接口:
http://127.0.0.1:8888/test/get
@RestController
@RequestMapping("/test")
public class TestController {


    @PostMapping("/get")
    public BaseResponse get(){
        Map res = new HashMap<>();
        res.put("name","yx");
        return BaseResponse.success(res);
    }
}
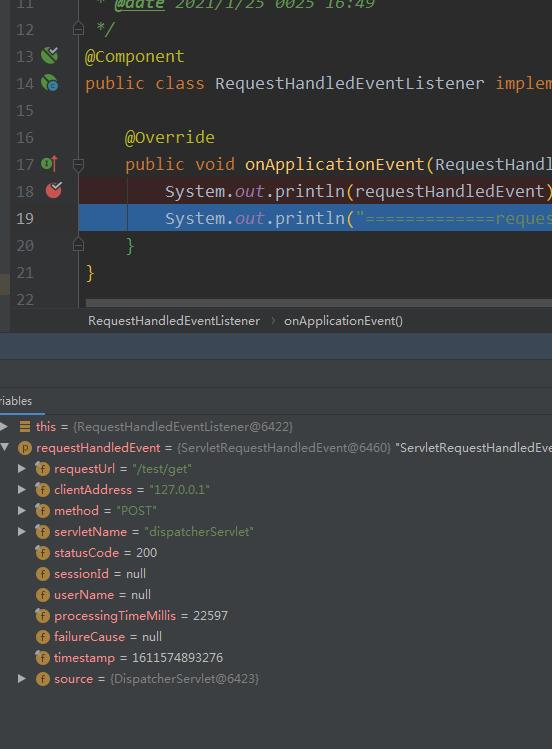
发现,先走到
res.put("name","yx");在返回response之前,进入事件监听
日志打印:
ServletRequestHandledEvent: url=[/test/get]; client=[127.0.0.1]; method=[POST]; servlet=[dispatcherServlet]; session=[null]; user=[null]; time=[22597ms]; status=[OK]
=============requestHandledEvent............................
从上面的demo可以看出,几个事件都按照说明实际执行了。我们再来体验下自定义事件。
2). 自定义事件监听
1>. 定义事件类型
public class MyEvent extends ApplicationEvent {

    private String name;

    public MyEvent(Object source, String name) {
        super(source);
        this.name = name;
    }

    public String getName() {
        return name;
    }

    public void setName(String name) {
        this.name = name;
    }
}
2>. 定义listener
@Component
public class MyEventListener implements ApplicationListener<MyEvent> {

    @Override
    public void onApplicationEvent(MyEvent myEvent) {
        System.out.println("===========自定义事件==========");
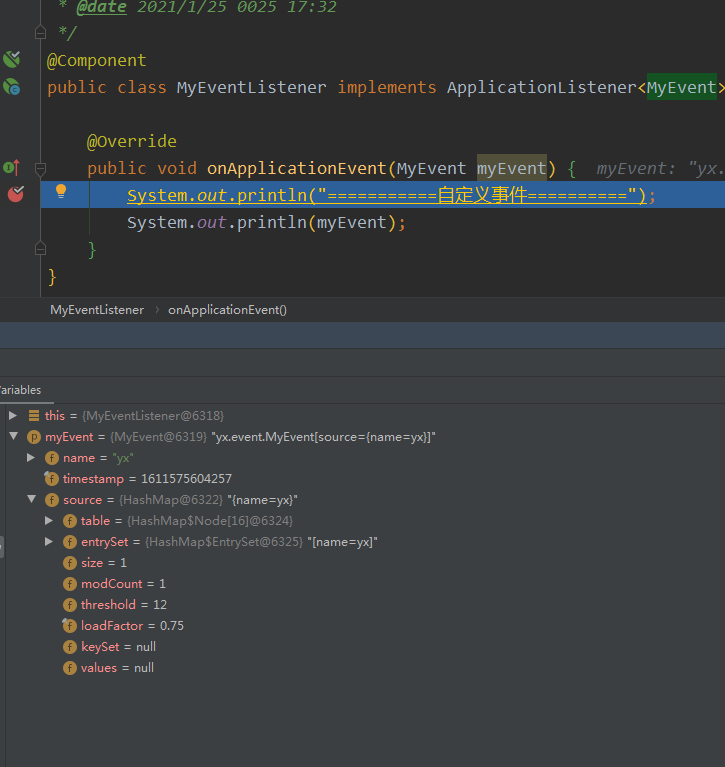
        System.out.println(myEvent);
    }
}
要点:ApplicationListener的事件泛型为 MyEvent,MyEventListener 要加上@Component
3>. 发布事件
@Autowired
private ApplicationEventPublisher eventPublisher;

@PostMapping("/get")
public BaseResponse get(){
    Map res = new HashMap<>();
    res.put("name","yx");
    eventPublisher.publishEvent(new MyEvent(res,"yx"));
    return BaseResponse.success(res);
}
4>. 效果
3). 基于注解实现
1>. 事件定义一样的
2>. listener定义不一样,不用实现接口了
@Component
public class MyEvent2Listener {

    @EventListener(classes={MyEvent2.class})
    public void listen(MyEvent2 event){
        System.out.println("MyEvent2Listener。。监听到的事件:" + event);
    }

}
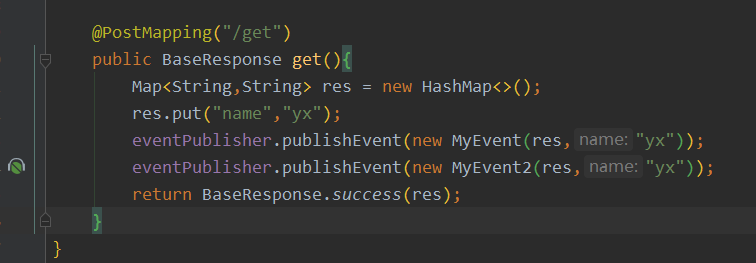
3>. 发布事件,使用注解实现的话,idea左侧会有提示具体的监听地方,点击就进去了,如下图 MyEvent2的发布
4>. 效果一样
四. ApplicationContext在soul中的应用
1). 在用户使用注解 @SoulSpringMvcClient(path = "/test/**") 将用户端的路由信息同步到admin时,使用了ApplicationContext的ContextRefreshedEvent事件,作用是在bean初始化的时候,判断配置文件是否是全部代理,进行数据同步操作
@Slf4j
public class ContextRegisterListener implements ApplicationListener {

    ...

    @Override
    public void onApplicationEvent(final ContextRefreshedEvent contextRefreshedEvent) {
        if (!registered.compareAndSet(false, true)) {
            return;
        }
        if (soulSpringMvcConfig.isFull()) {
            post(buildJsonParams(soulSpringMvcConfig.getContextPath()));
        }
    }

    private void post(final String json) {

        ...
    }
}
2). 在admin模块大量使用自定义事件DataChangedEvent,在DataChangedEvent里面加入事件类型,配置组等概念
public class DataChangedEvent extends ApplicationEvent {

    private DataEventTypeEnum eventType;

    private ConfigGroupEnum groupKey;

}
并在 DataChangedEventDispatcher 中实现 ApplicationListener接口,监听事件,并根据事件类型的不同进行具体的数据发送
@Component
public class DataChangedEventDispatcher implements ApplicationListener, InitializingBean {
    private ApplicationContext applicationContext;

    private List listeners;

    public DataChangedEventDispatcher(final ApplicationContext applicationContext) {
        this.applicationContext = applicationContext;
    }

    public void onApplicationEvent(final DataChangedEvent event) {
        for (DataChangedListener listener : listeners) {
            switch (event.getGroupKey()) {
                case APP_AUTH:
                    listener.onAppAuthChanged((List) event.getSource(), event.getEventType());
                    break;
                case PLUGIN:
                    listener.onPluginChanged((List) event.getSource(), event.getEventType());
                    break;
                case RULE:
                    listener.onRuleChanged((List) event.getSource(), event.getEventType());
                    break;
                case SELECTOR:
                    listener.onSelectorChanged((List) event.getSource(), event.getEventType());
                    break;
                case META_DATA:
                    listener.onMetaDataChanged((List) event.getSource(), event.getEventType());
                    break;
                default:
                    throw new IllegalStateException("Unexpected value: " + event.getGroupKey());
            }
        }
    }

    ...
}
实现 InitializingBean 接口是为了在初始化的时候,根据配置文件,实例化相应的数据同步方式,也就是 定义成员变量 listeners
@Override
public void afterPropertiesSet() {
    Collection listenerBeans = applicationContext.getBeansOfType(DataChangedListener.class).values();
    this.listeners = Collections.unmodifiableList(new ArrayList<>(listenerBeans));
}
具体的使用还有很多种,根据需求可以灵活做出调整,最常见的使用还是,定义事件,监听事件,统一处理
版权声明:本文由星尘阁原创出品,转载请注明出处!